Gibson cloning
Use this page when you want to assemble a backbone and one or more inserts by overlap, check the junction quality, and create the final construct in one workflow.
Before you start
- Open a construct with valid sequence content.
- Make sure any reusable inserts or cut fragments are available in your workspace
ProjectsorParts.
Switch to cloning view and stage the assembly
- Open the construct workspace and switch the main view to
Cloning. - In the
Techniquepicker, chooseGibson. - Set the backbone source to the current plasmid or to a reusable cut plasmid from the library.
- Add one or more inserts with the staging controls and confirm their order and orientation.
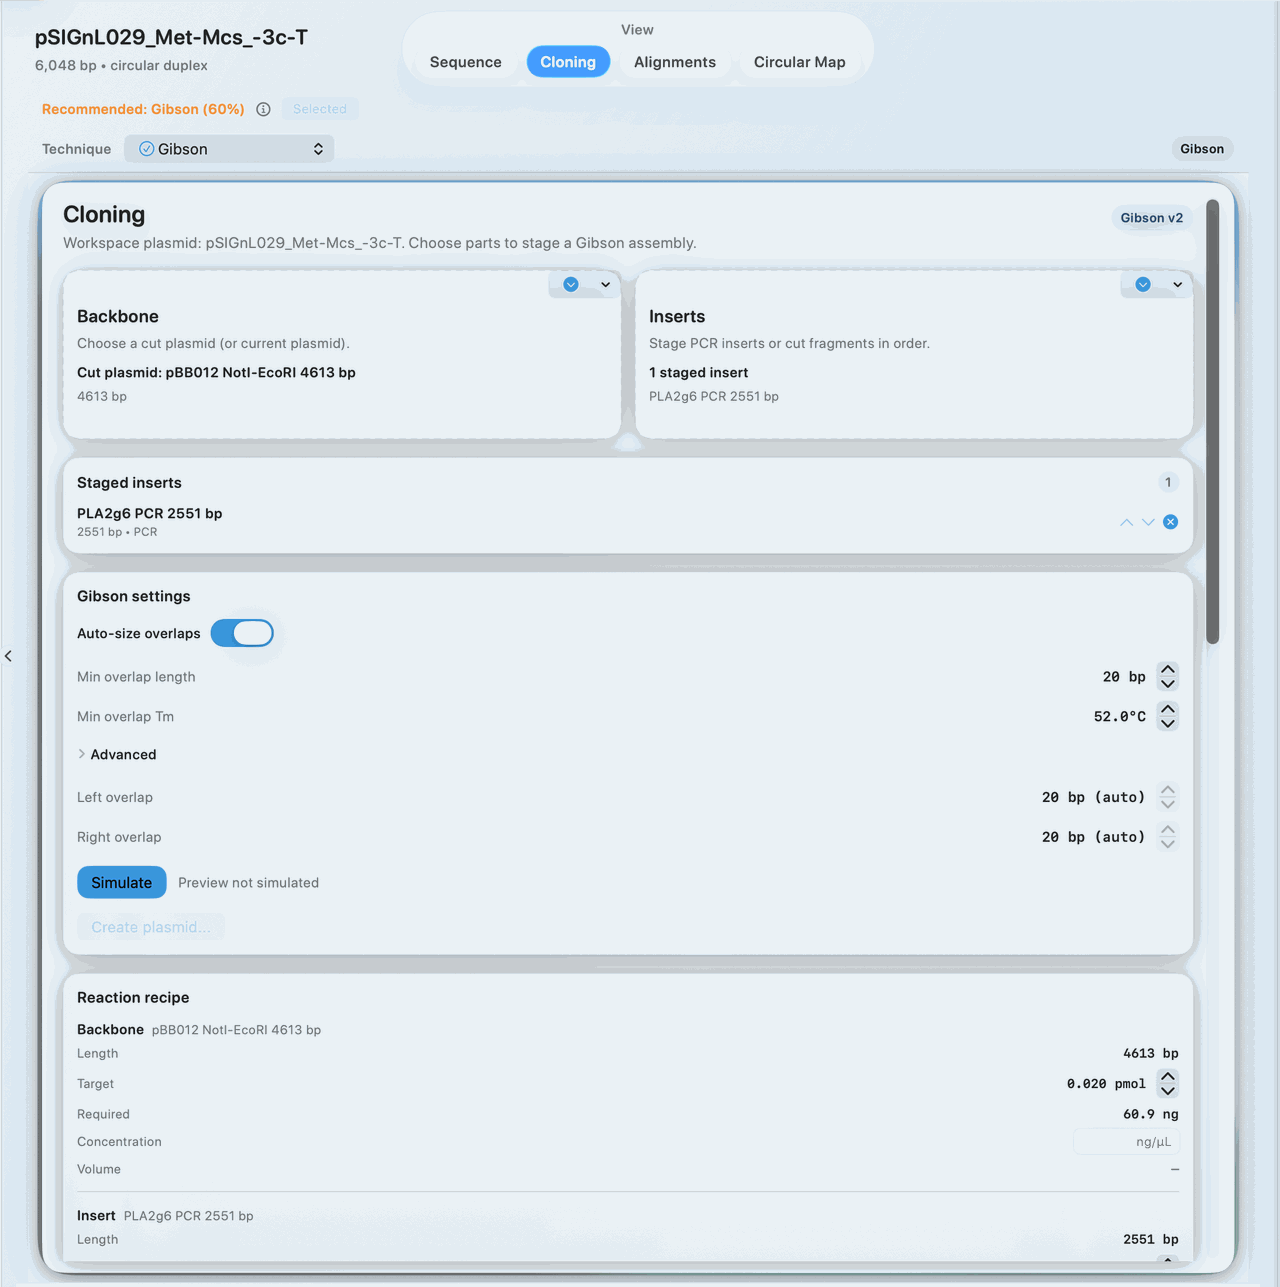
Set overlap constraints and run the simulation
In Gibson settings, review the controls that affect the QC state:
Auto-size overlapsMin overlap lengthMin overlap Tm- optional
Max overlap length
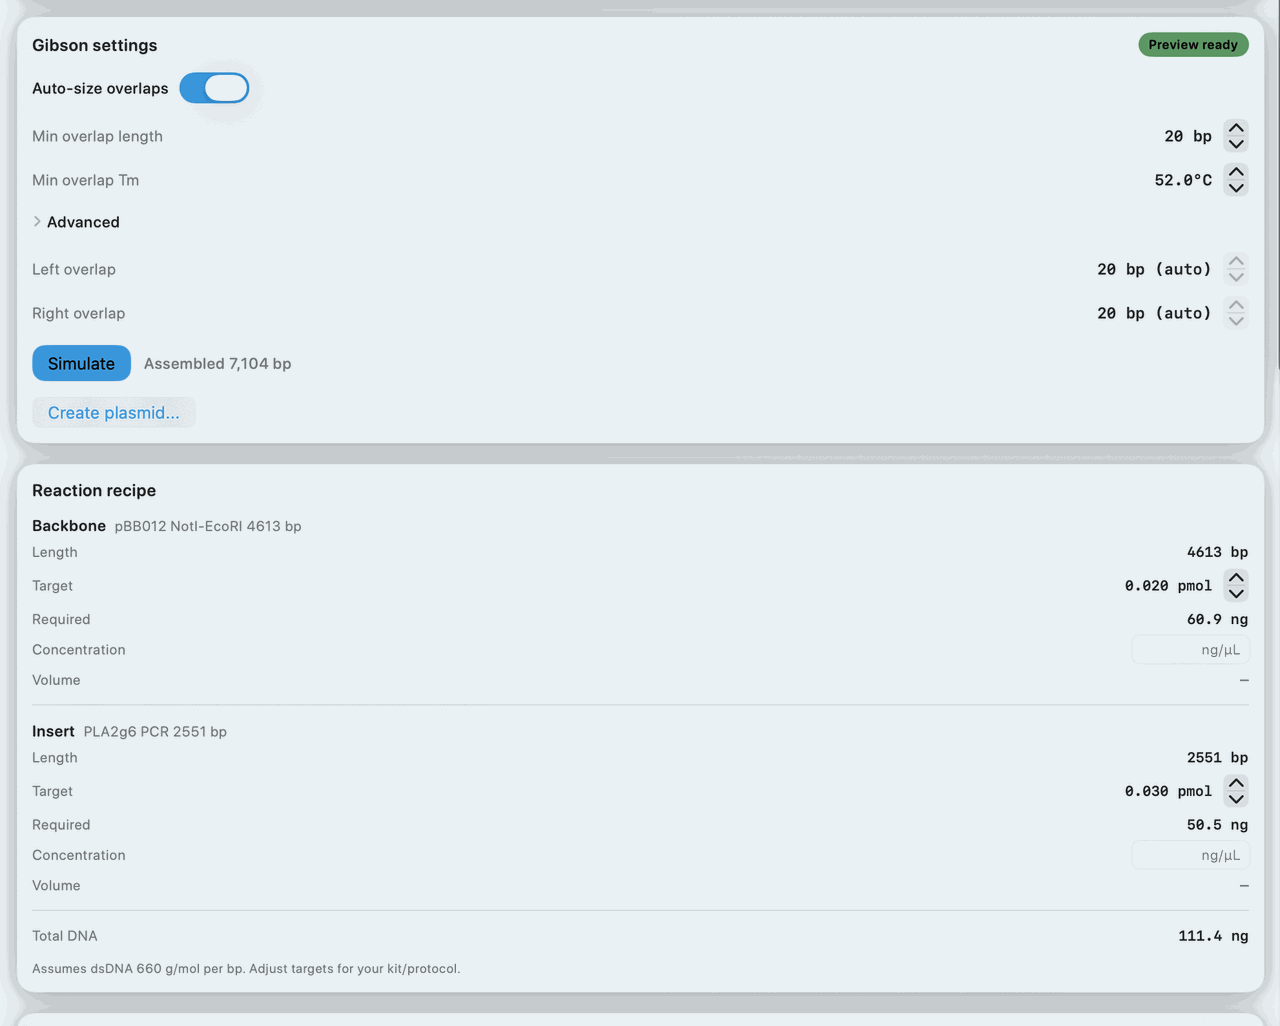
Then click Simulate and wait for the preview to populate.
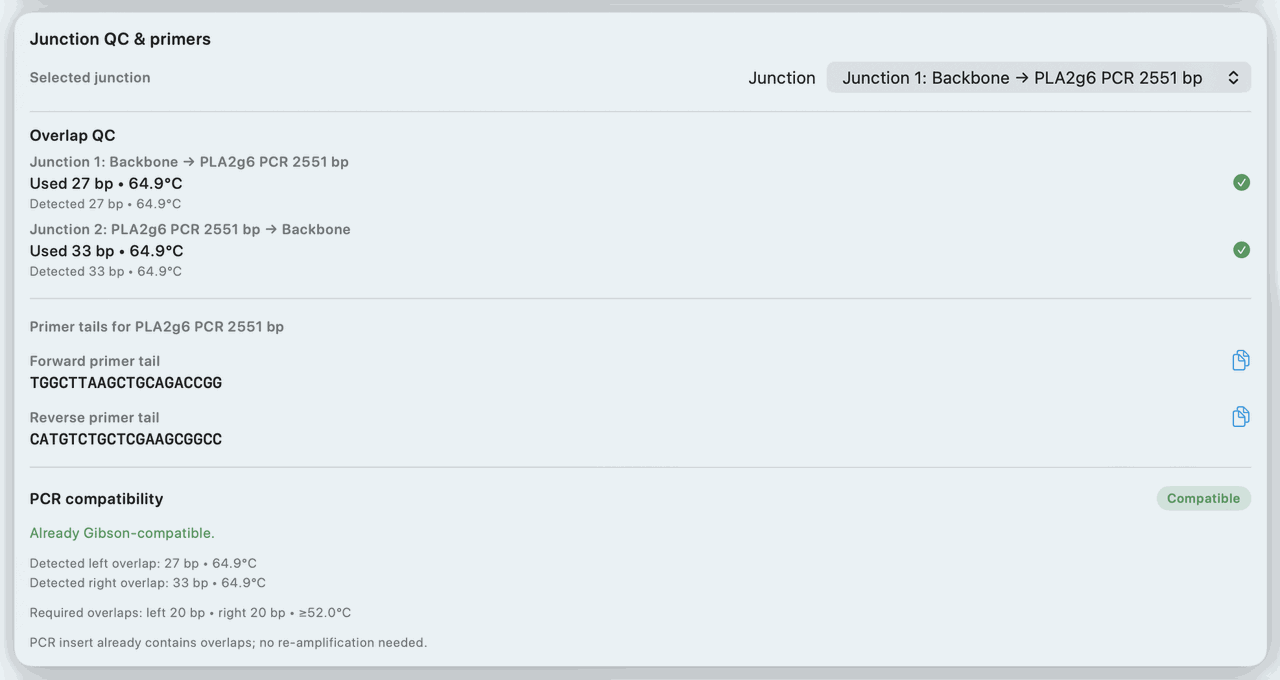
Review overlap QC and junction details before creation
- Open the
Junction QC & primersarea and inspect the selected junction. - Review the
Overlap QCsummary for pass or fail status. - Check whether the primer actions or compatibility notes change based on the staged junction.
- If the overlap is weak, adjust length, Tm target, insert order, or orientation and run
Simulateagain.
Create the assembled plasmid
- Confirm the preview map reflects the construct you intended to build.
- Click
Create plasmid.... - Enter the plasmid name and confirm creation.
- Open the new record in
SequenceorCircular Mapview for a final review.
If it doesn't look right
Simulateis disabled: Confirm that a backbone and at least one insert with real sequence are staged.- Overlap QC fails: Increase the overlap length, revisit the Tm target, or change the insert order before creating the plasmid.
- The create action has no usable preview:
Run
Simulateagain and check the junction review first.